Nalbinding for those who think they can’t: Mittens
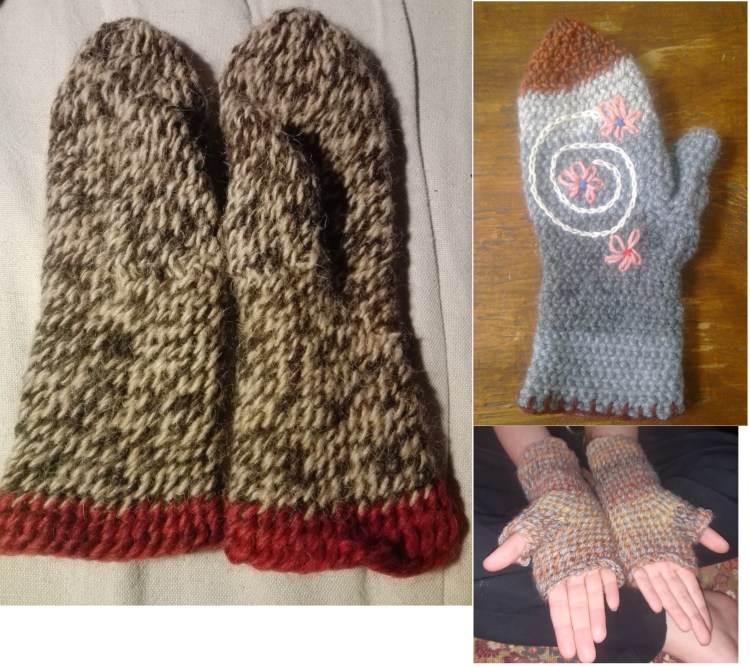
Here’s a free pattern and tutorial for making naalbound mittens. There are 2 ways of doing nalbinding: creating loops around the thumb, or creating loops without the use of your thumb. In this tutorial you will not use your thumb, because sometimes it is easier to learn nalbinding that way.
I am using store bought yarn for knitting needle nr. 4 (UK needle 8/US needle 6). If this is your first pair, please use very cheap wool you don’t mind “messing up”.
You need:
- 1 big needle
- Yarn for knitting needle nr. 4
- Scissors
- Optional: stitch markers (safety pins will also do the trick)
These mittens are made from the tips of your fingers working your way down to your wrist.
The start of your mitten
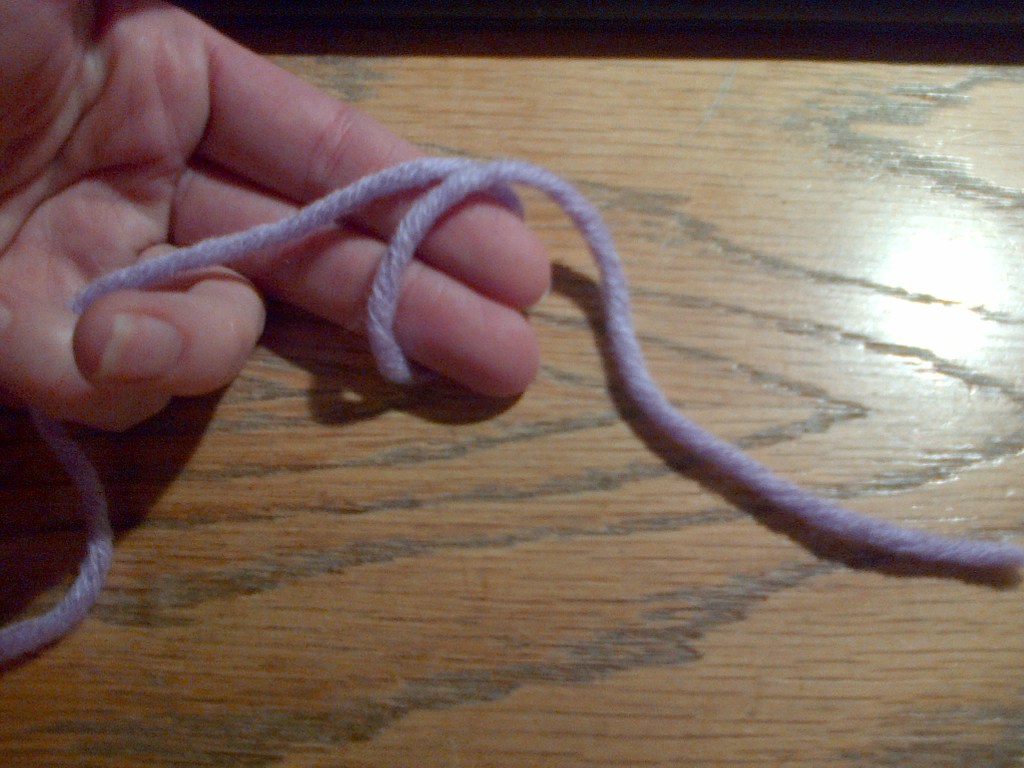
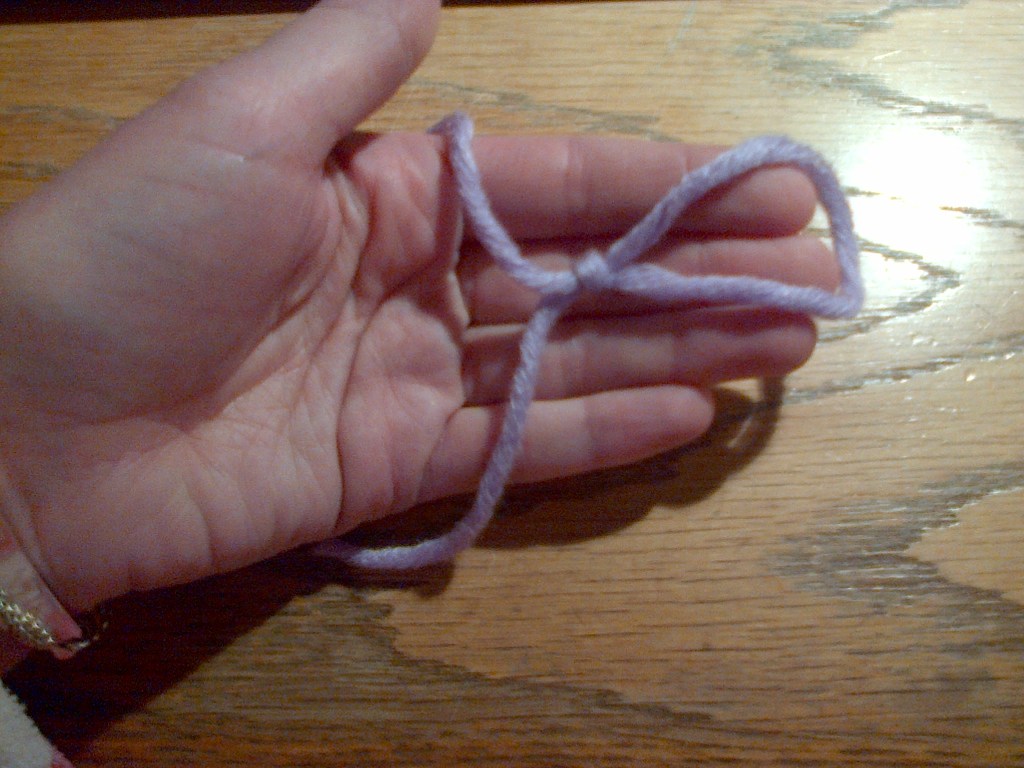
Start with a loop. It should be a sliding loop or slipknot, the type you can make smaller and bigger. Make sure you make the loop on the short end of the string, you’ll want to be able to make the loop smaller with the short end.

In the loop you will make 10 blanket or buttonhole stitches. In nalbinding the buttonhole stitch is called the Danish stitch. Don’t make your stitches too tight!
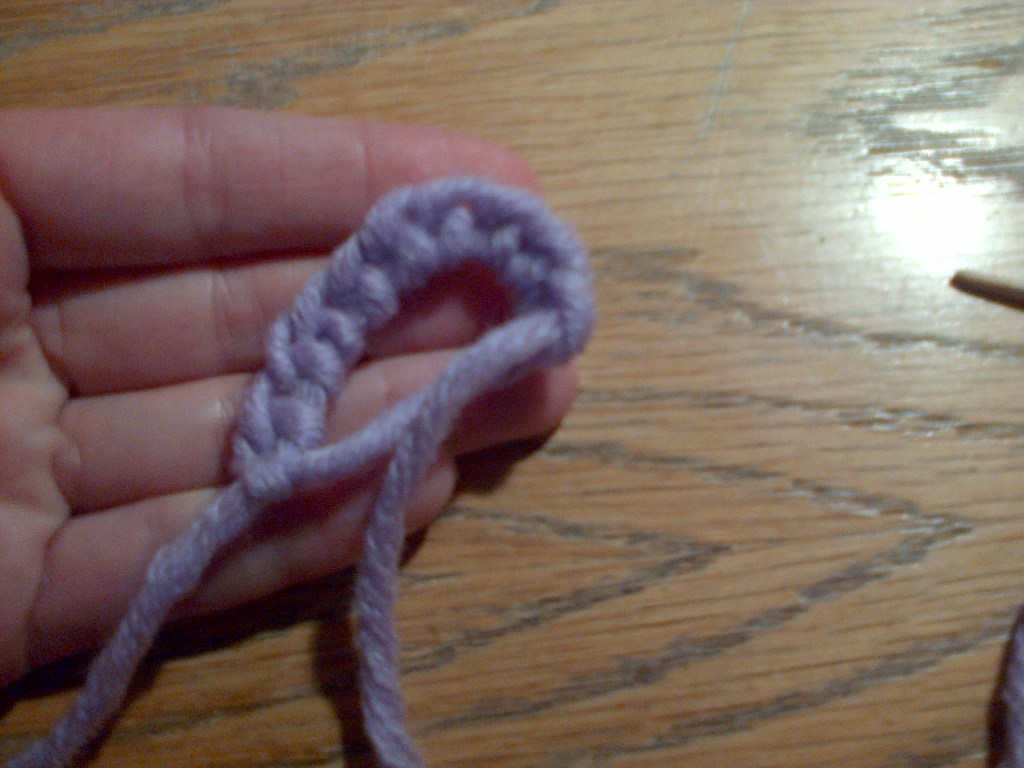
Once you have made 10 buttonhole stitches in your loop, you close the loop by pulling it tight. Do not pull the thread you have used to make your 10 buttonhole stitches, but pull the thread that comes from the original loop.

Now, you are going to start the second row of your project. Continue with the blanket/buttonhole stitch. Similar to crochet, you need to increase stitches gradually. Basically, this means you must do 2 stitches in 1 loop from the previous row, and you must do this every other stitch. So, round one was 10 stitches, round 2 is also 10 stitches but after row 2 you should start increasing. On row 3 you will have 15 stitches, row 4 will have 22 stitches, etc… From row 5 onwards, start to count your stitches carefully and do the increasing every 2nd stitch.
You need a circle of about 9-10cm in diameter. To make sure you have the right size for your hands, here’s what you do:
Once your nalbound circle is about 9-10cm in diameter, you fold it in half and place it on your fingers.

This circle, which is basically the size of a coaster, should cover the tips of your fingers completely. You need to eyeball this here, because your pinky is probably positioned too low on your hand to be actually covered. If you are at the right size then you can stop increasing. Can you still see a bit of finger? Add a few stitches and do a bit more increasing.
When you have stopped increasing, you continue to work the stitches as you see them. Make sure you count the stitches and write them down, because you need that to make mitten no. 2 after this one is finished.
Now you will start creating the ‘hand part’ of your mitten.
Continue to work the stitches as you see them, no more increasing. Don’t make your stitches too tight! This finger part of your mitten looks like a pouch that will fit your hand until the point or ‘dent’ where your thumb begins.

The Thumb-but-not-yet
Now, you need to make the ‘cross-over’ to make room for your thumb. You do this by creating a chain of stitches that form a loop around your thumb.
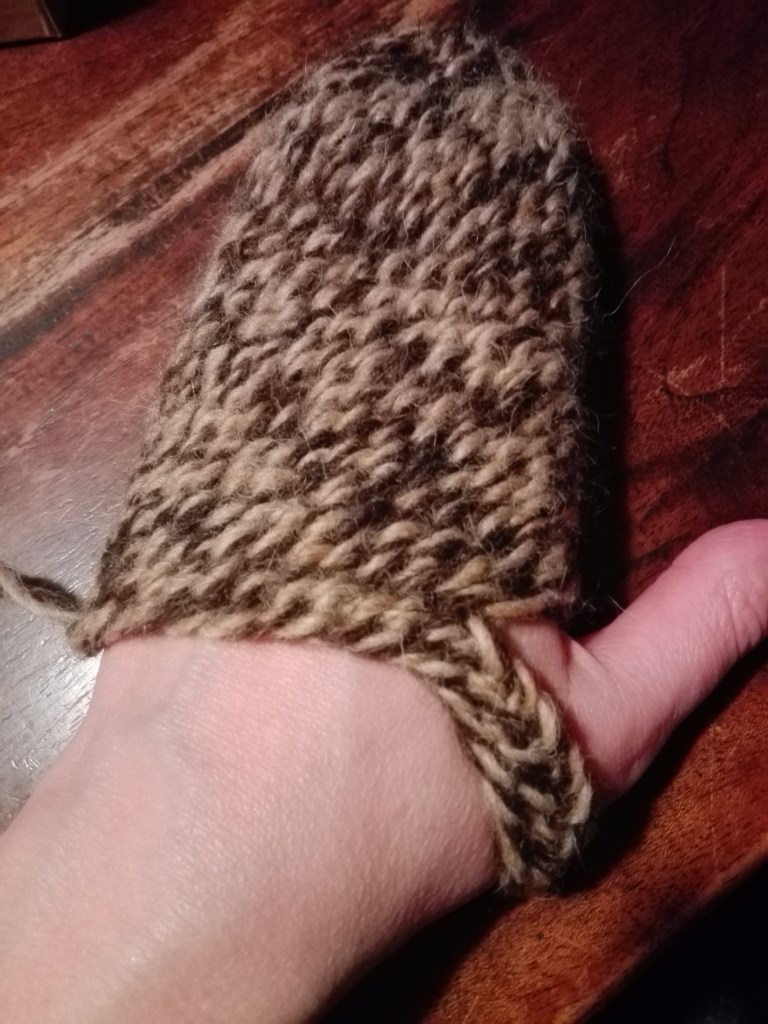
If your chain is long enough and goes around your thumb comfortably, then attach the last stitch again on your mitten. Make sure you count the stitches!
Now, the next step is important! The number of stitches you had *before* the thumb loop, is also the number of stitches you need for the wrist part. So if your hand part was 29 stitches and the loop around your thumb is 10 stitches, you must decrease to the original 29 stitches, otherwise the wrist part of your mitten will be too wide and won’t give you any warmth. Decreasing is, similar to crochet, skipping a stitch.
The Thumb really this time!
For the thumb, pick up the stitches in the opening of the thumb hole.
In the first 2 rounds, make all stitches as you see them. This is to make sure your thumb can move around in your mitten comfortably. After this, in the next round, decrease 2 stitches. FIT REGULARLY!

picture by M. Boreham
In further rounds, continue to decrease 2 stitches each time until you have a) covered your entire thumb, and b) have about 5 or 6 stitches left. Sew those last stitches up to close the thumb.
To finish, weave in the ends of the yarn and you’re done!
Please note: Don’t put your mittens in the washing machine! Wash them by hand with a little bit of soap and lukewarm water.
